All About the Crooked Knife
What is a Crooked Knife?
A crooked knife, sometimes called a "mocotaugan", is a special type of wood working tool that can perform many of the jobs that would normally require a plane, draw knife or gouge. It achieves this by having a blade bent at or near the tip combined with a handle with a special shape to make it easier to use one handed. The ability to use the tool one handed means that the other hand is free to hold and manipulate the wood being worked on and therfore a vise or shaving horse is not required.
The combination of one handed use, blade geometry and portability made the crooked knife a prized tool by anyone creating items out of wood in a rural or woodland setting. In fact, the primary users of Crooked Knives were First Nations peoples who combined the original mocotaugans made out of wood and beaver's teeth with steel brought by the Europeans. Given that their primary environment was the forest and they were often nomadic, a one handed tool that was easily portable and could be used for a myriad of projects made the Crooked Knife a prized possession.
How do you use a Crooked Knife.
How to hold a Crooked Knife:
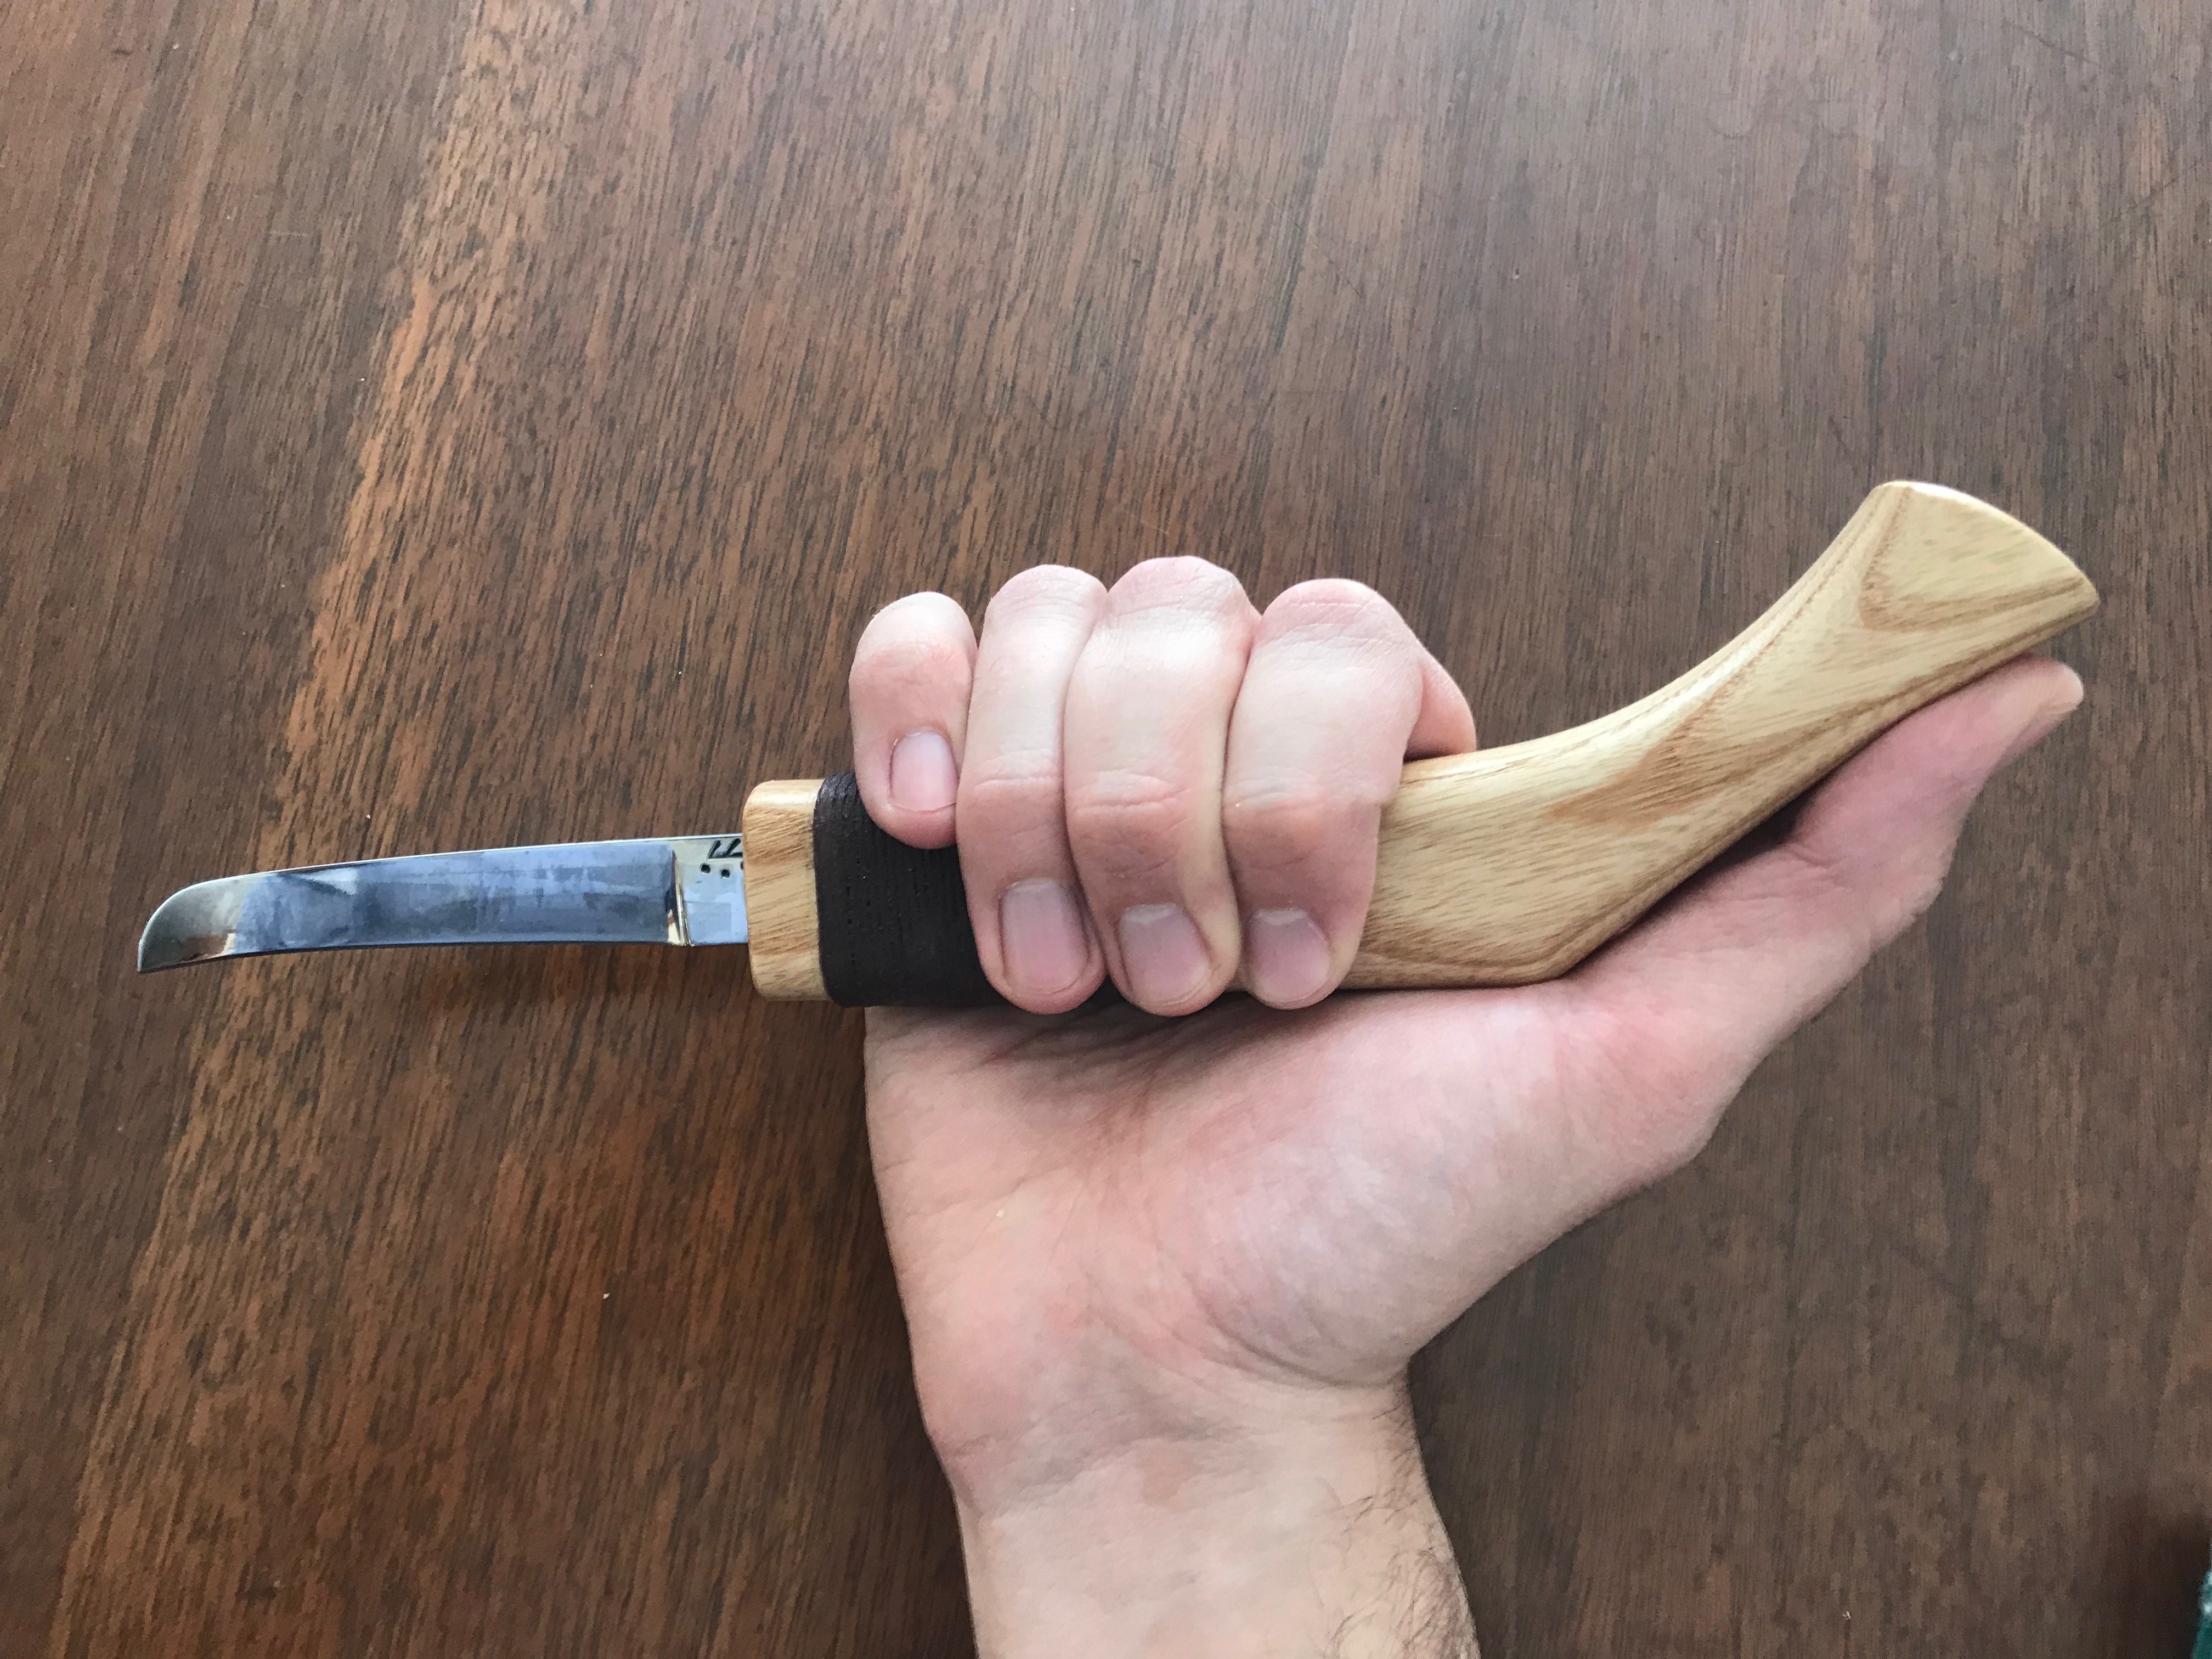
Regular Grip
This is the grip that you will use most often. With a firm grip on the knife, place your thumb on the angled portion of the handle.
One key thing to point out, the angle between your wrist and the blade should be slightly more than 90 degrees. Some crooked knives have this angle built in as part of the design as it can be more comfortable.
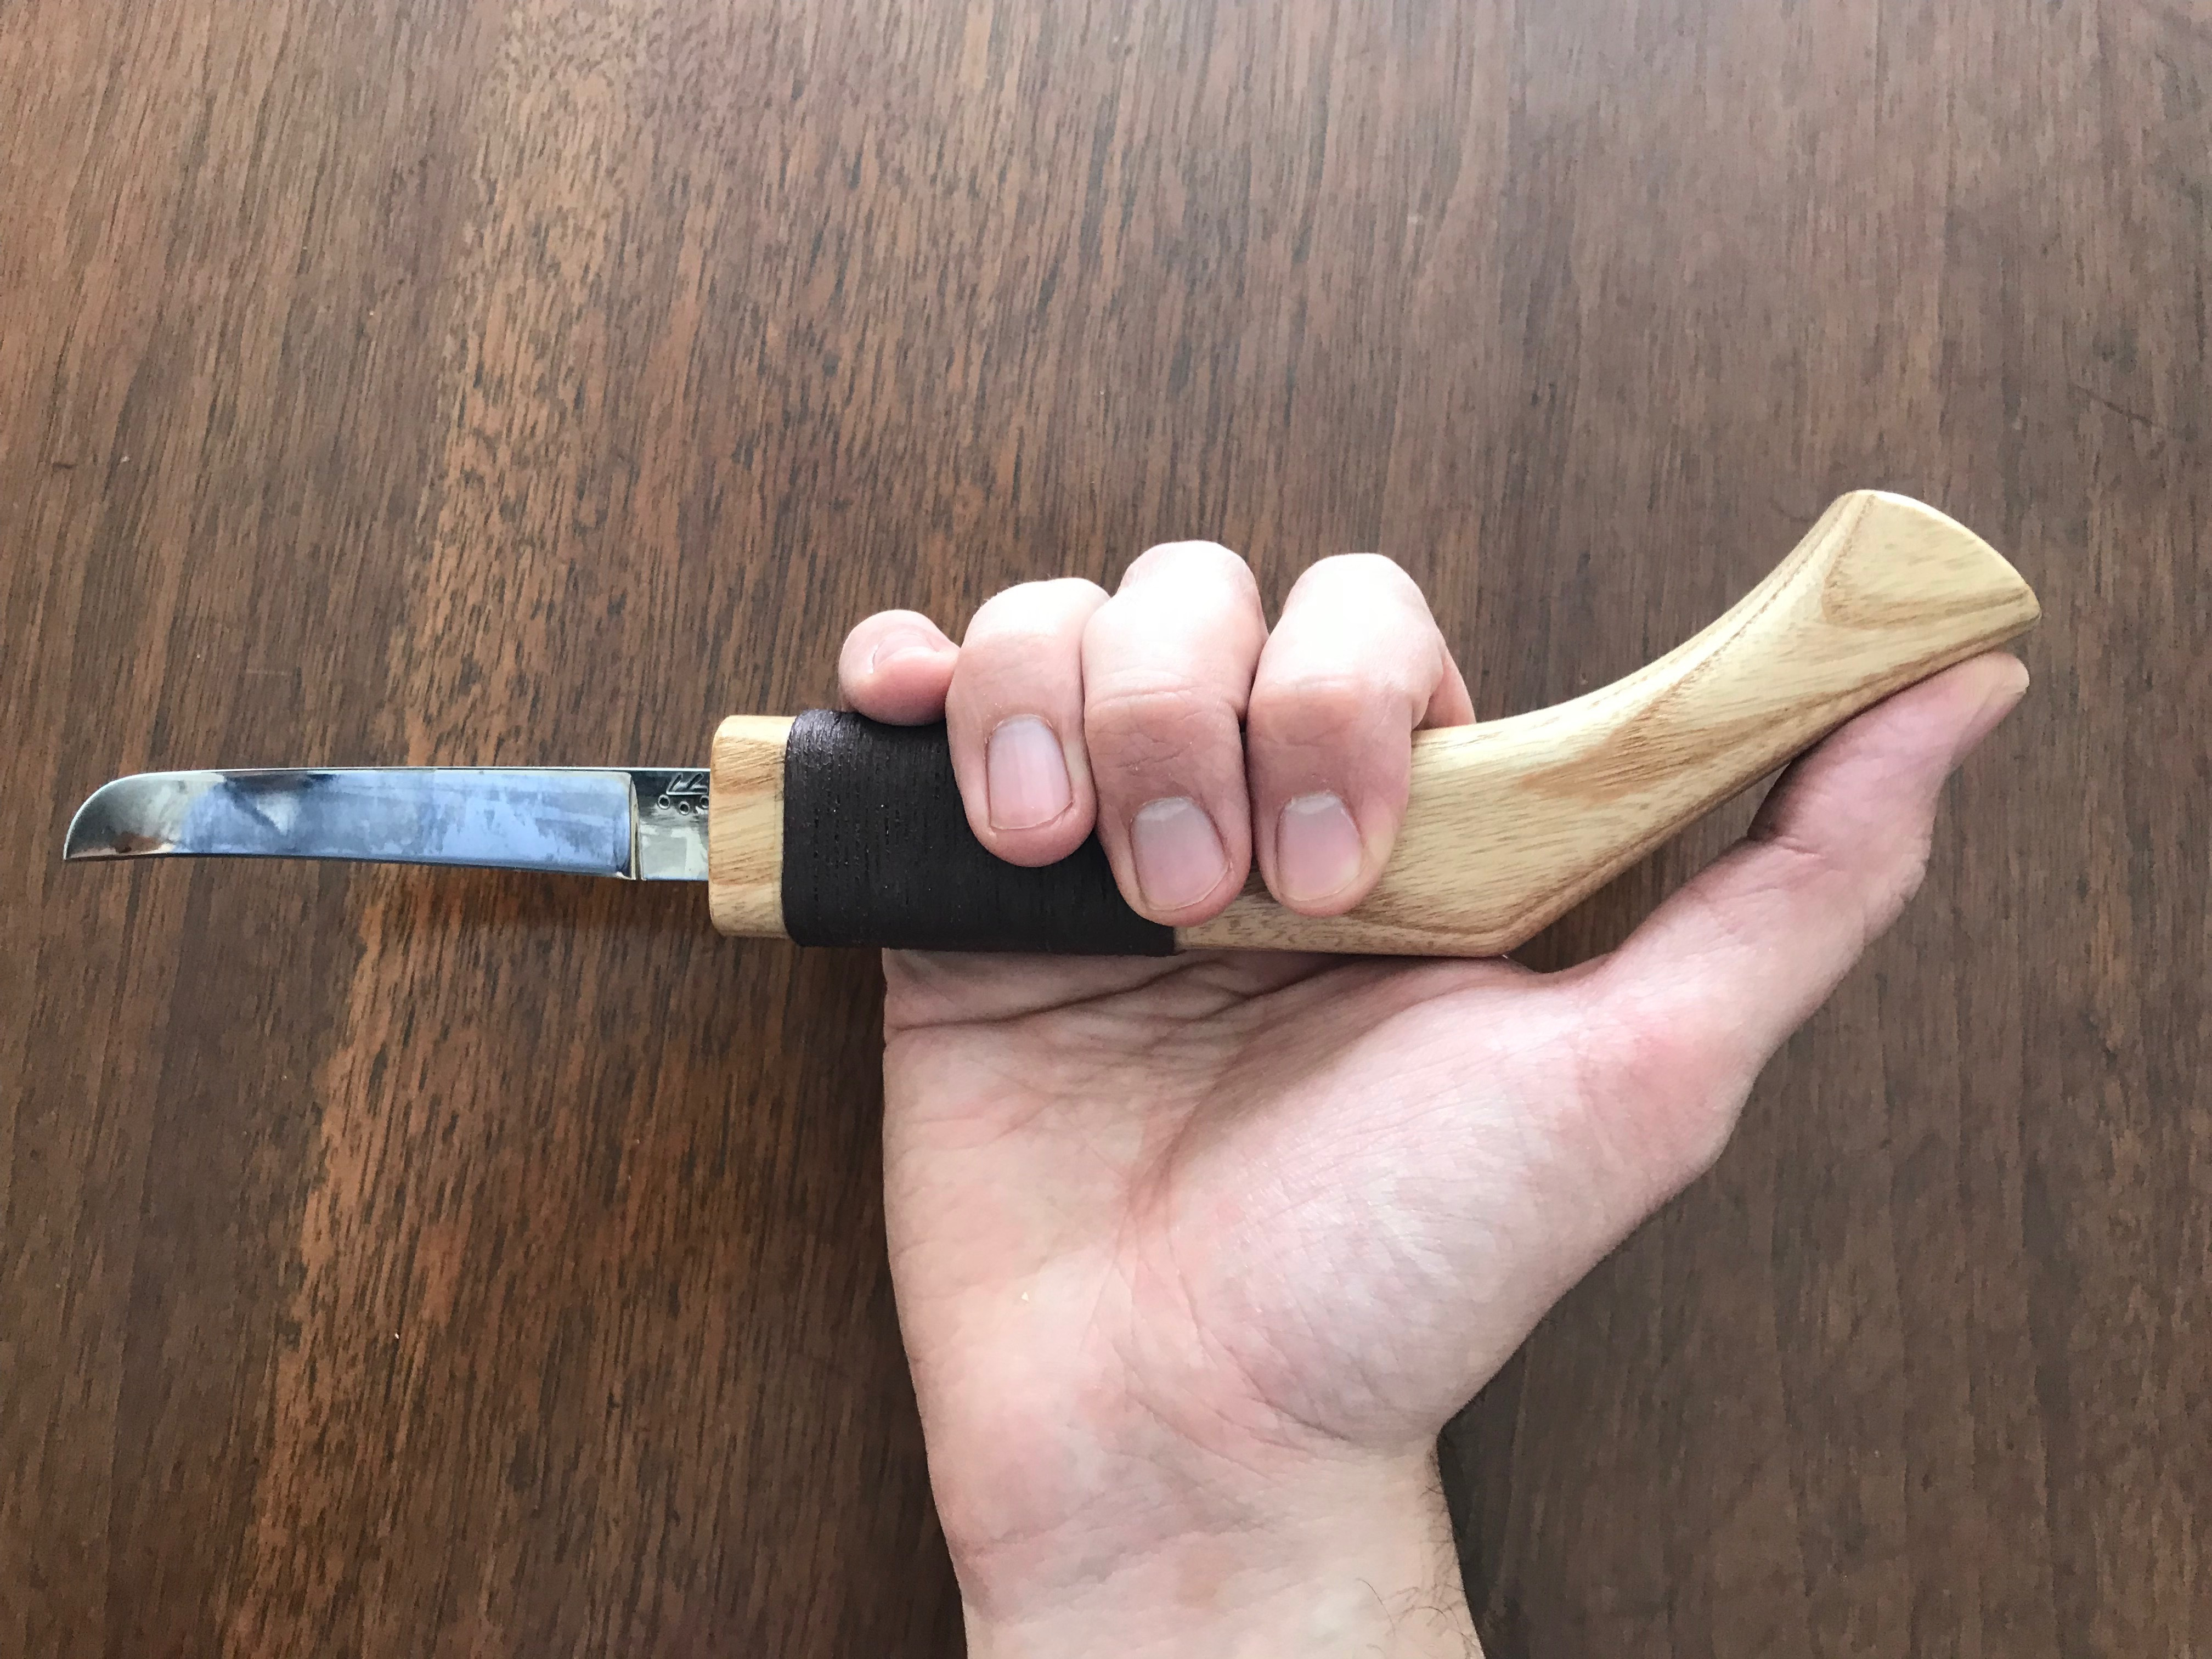
Loose Grip
This grip is very similar to the regular grip but is much more ergonomic. Instead of firmly holding the handle with your fingers, you are letting the handle rest closer to the tips of your fingers.
This is a more natural and neutral position for your hand and allows you to carve for longer periods of time.
How to hold what you are working on with a Crooked Knife:
Now is a good time to talk about safety. For many people, pulling a sharp knife towards you is not something they are used to. Generally, people are much more familiar with whittling where you are pushing the knife away from you.
With a Crooked Knife, you are pulling the knife towards your body. That means that how you hold both the item you are working on and the knife itself is very important if you want to stay safe.
Below we show you both an unsafe and safer way to use a Crooked Knife.
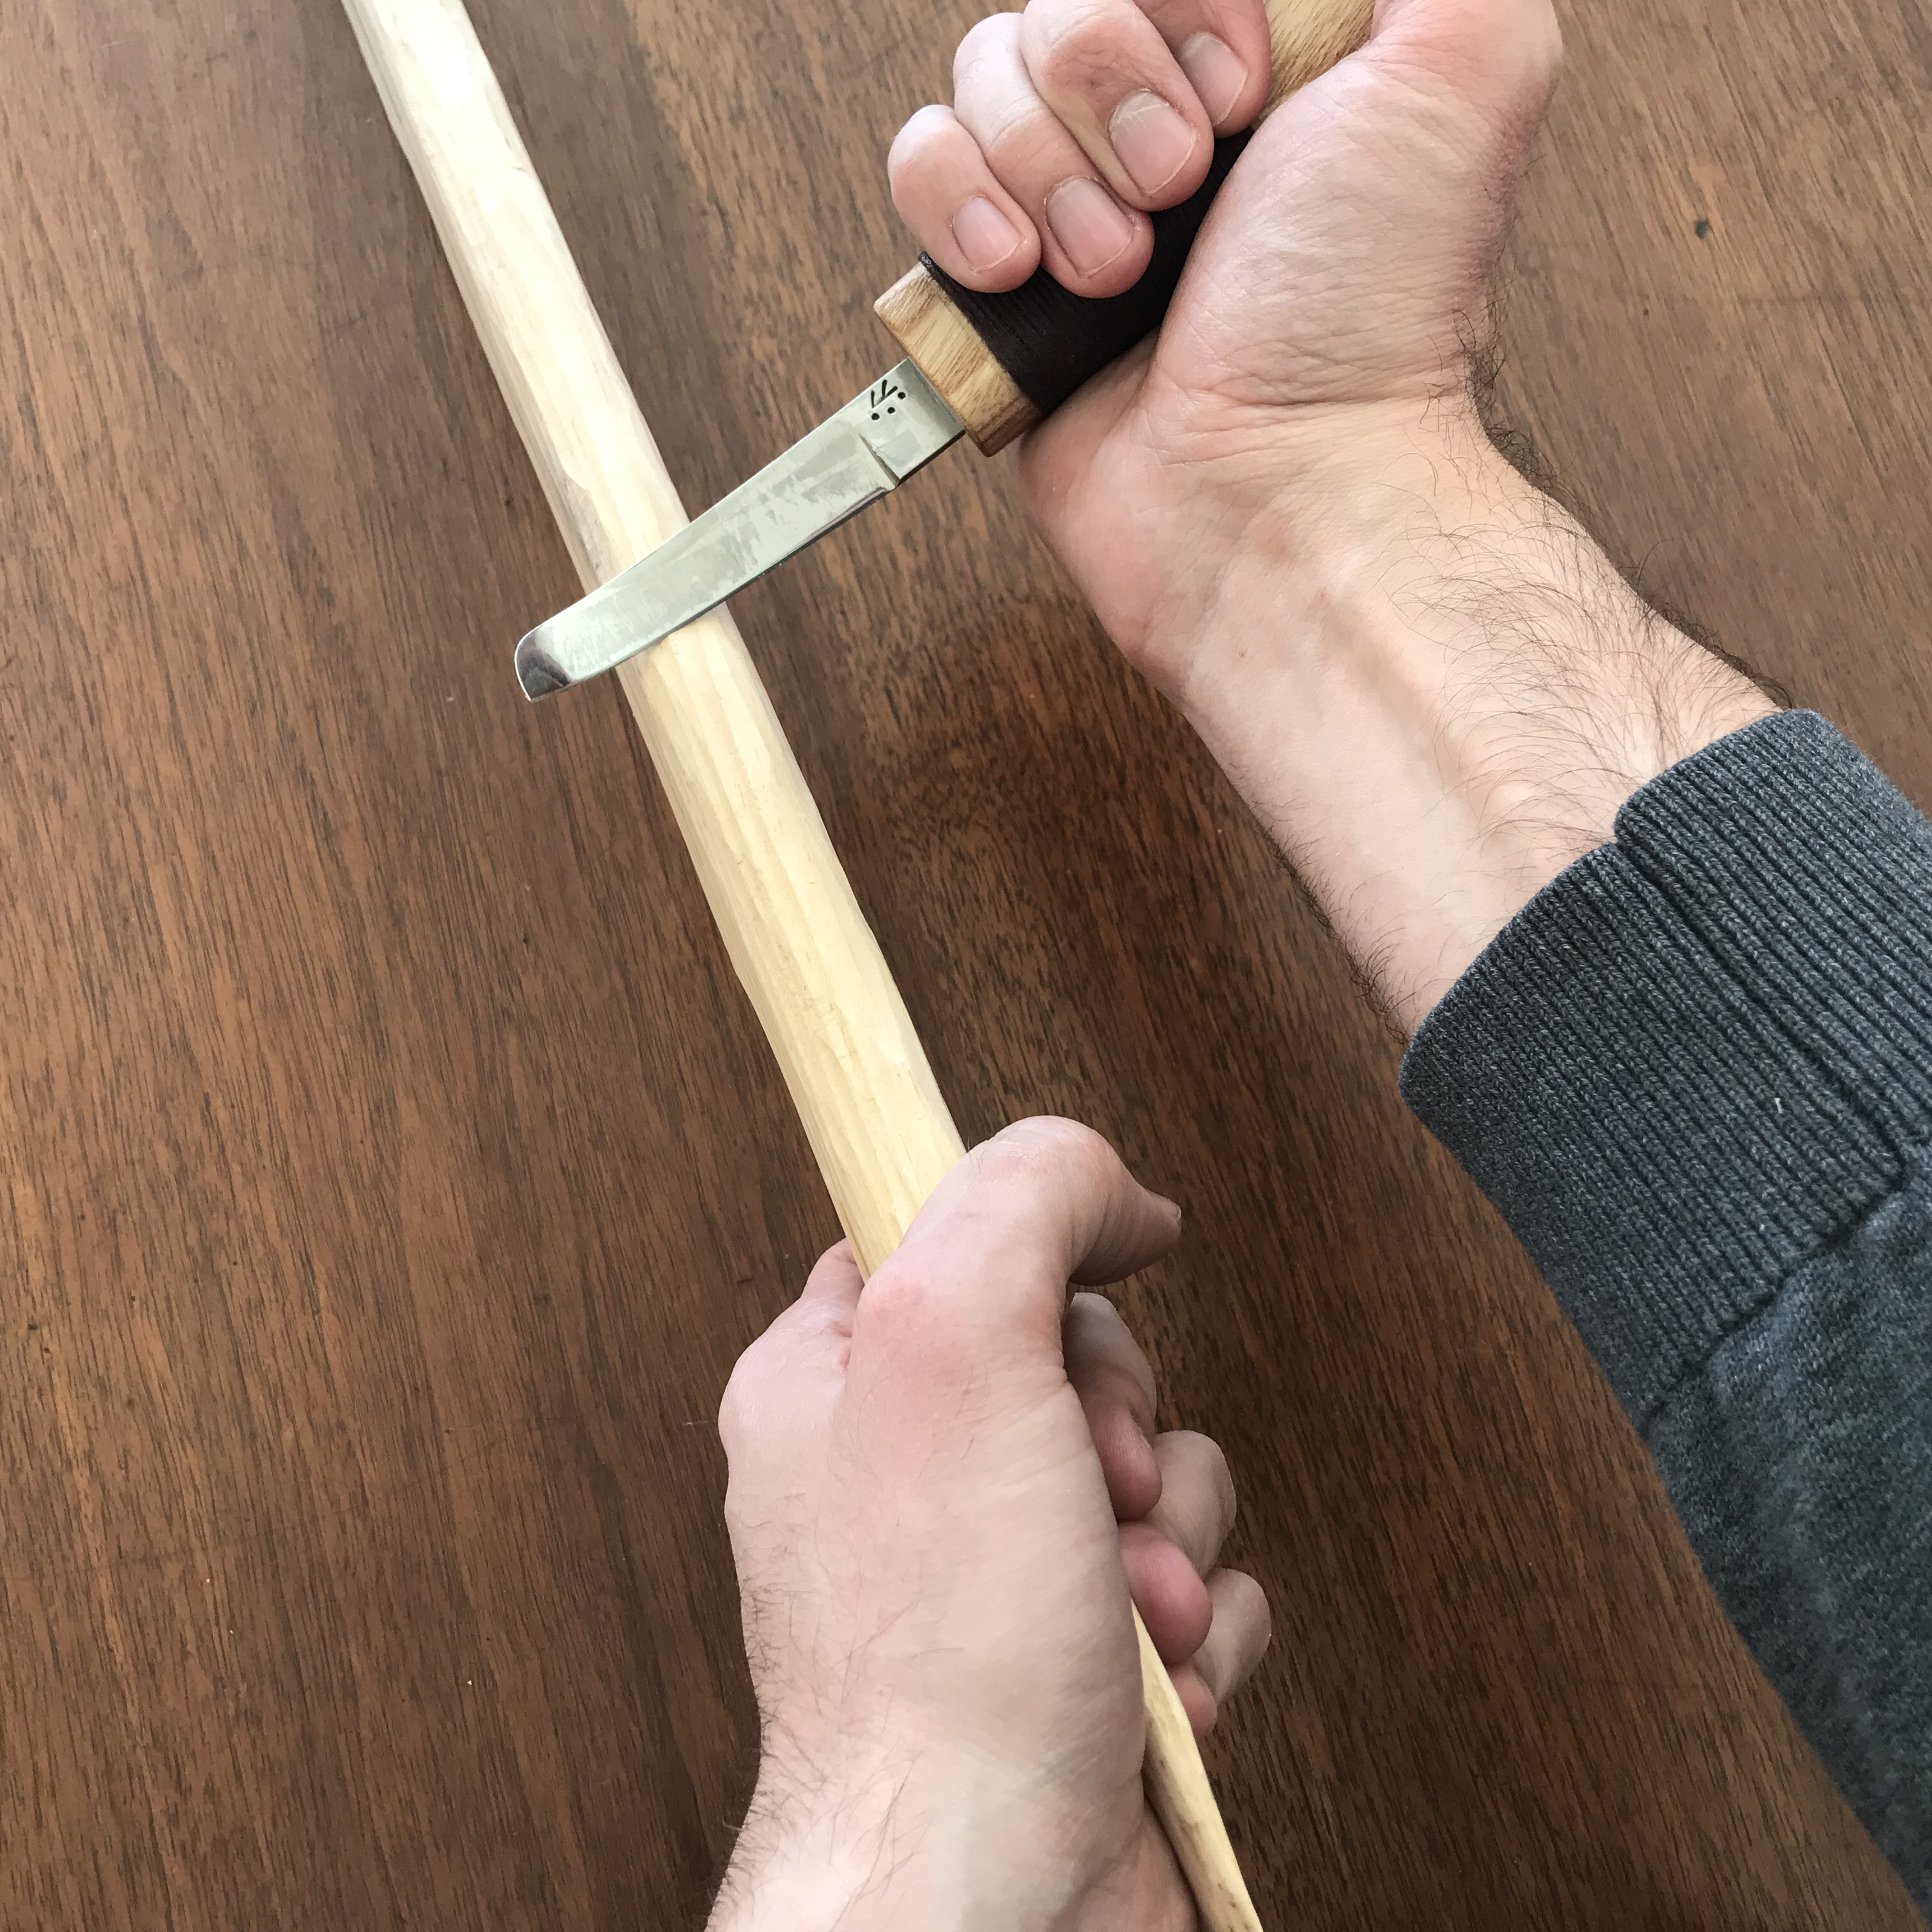
UNSAFE
- The hand holding the wood is in the path of the knife hand. This means if you pull too hard, the knife could go into your opposite hand.
- The knife hand is too far away from the work piece. When your knife hand is in this position, it is harder to predict where the knife will go.
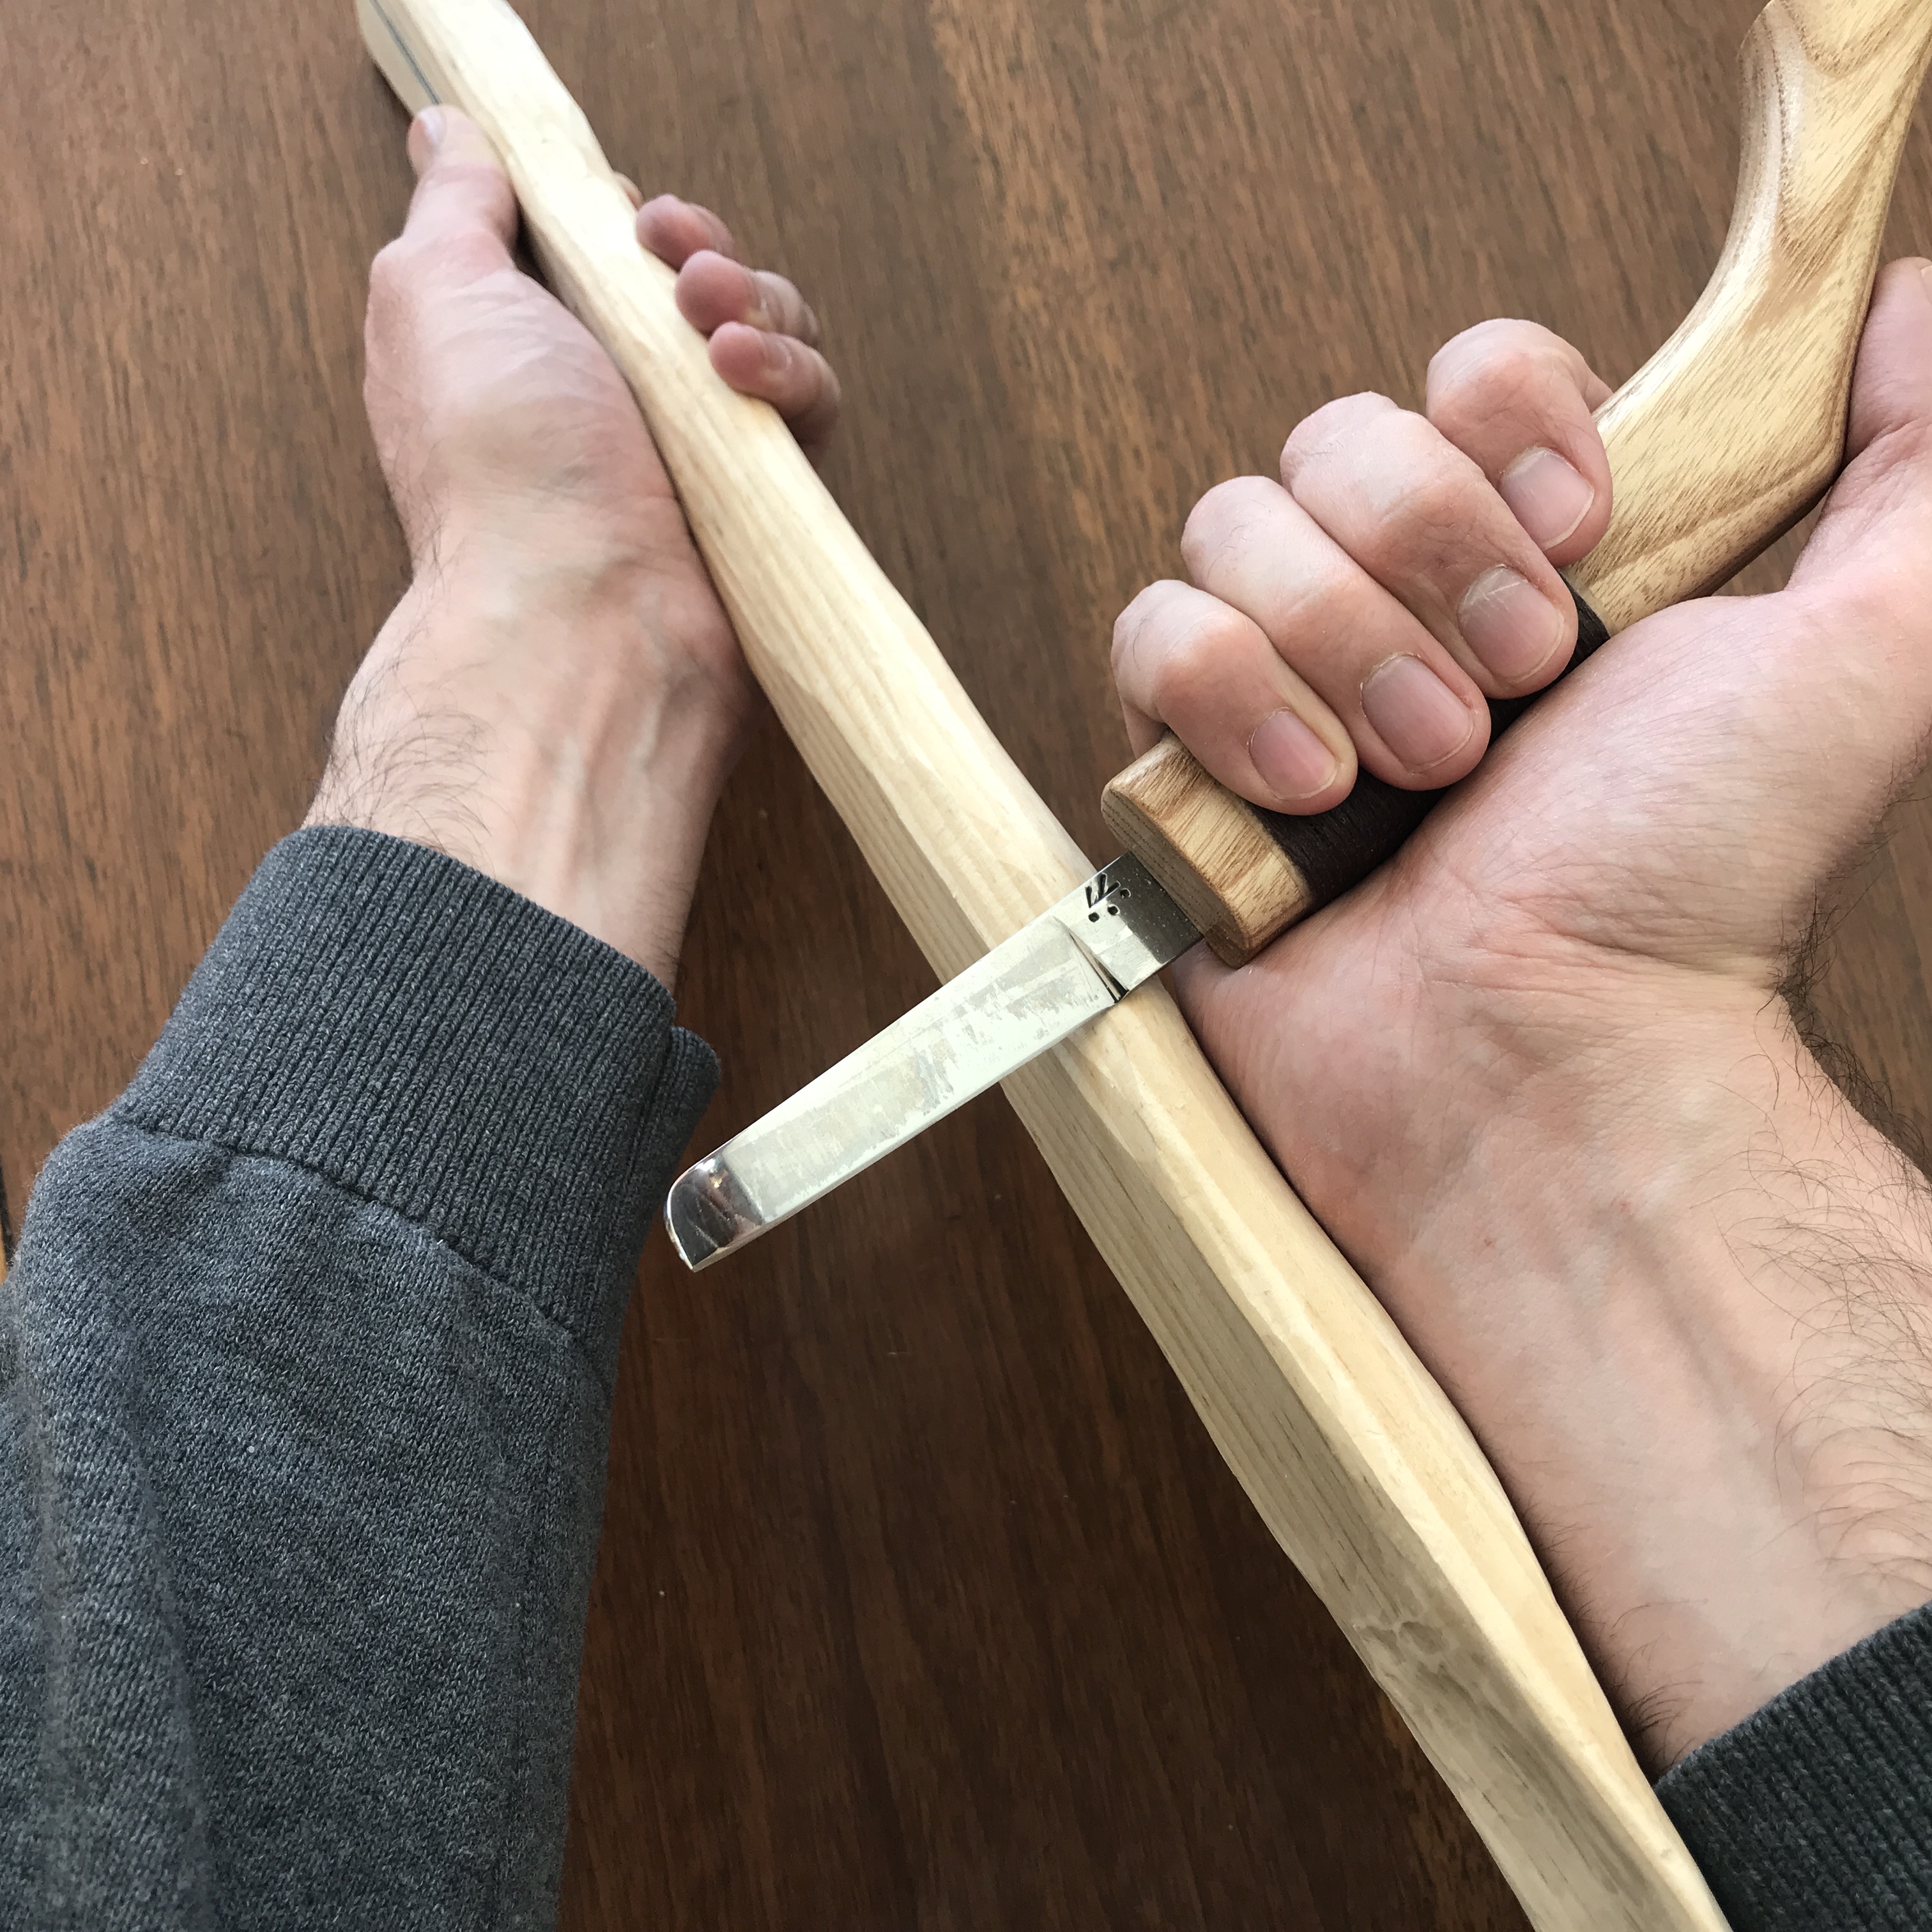
SAFE
- The hand holding the wood is well away from the path of the knife hand. In this example, there is no chance of the knife going into your opposite hand.
- The knife hand is held up against the work piece. With you knife hand in this position, the work piece acts as a guide and makes it very easy to predict where the knife is going to go.
How your elbow and shoulder are keeping your stomach safe:
A question people have when first using a Crooked Knife is: "How do you stop the knife from going into your body?"
Excellent question! And the simple answer is: your elbow and shoulder! The longer answer is that the your body's own physiology, specifically your shoulder and elbow's range of motion, is naturally preventing you from pulling the knife too far without feeling very uncomfortable.
As usual, we have some pictures below to illustrate what is going on (NOTE: the blade is wrapped in blue plastic to make it easier to see):
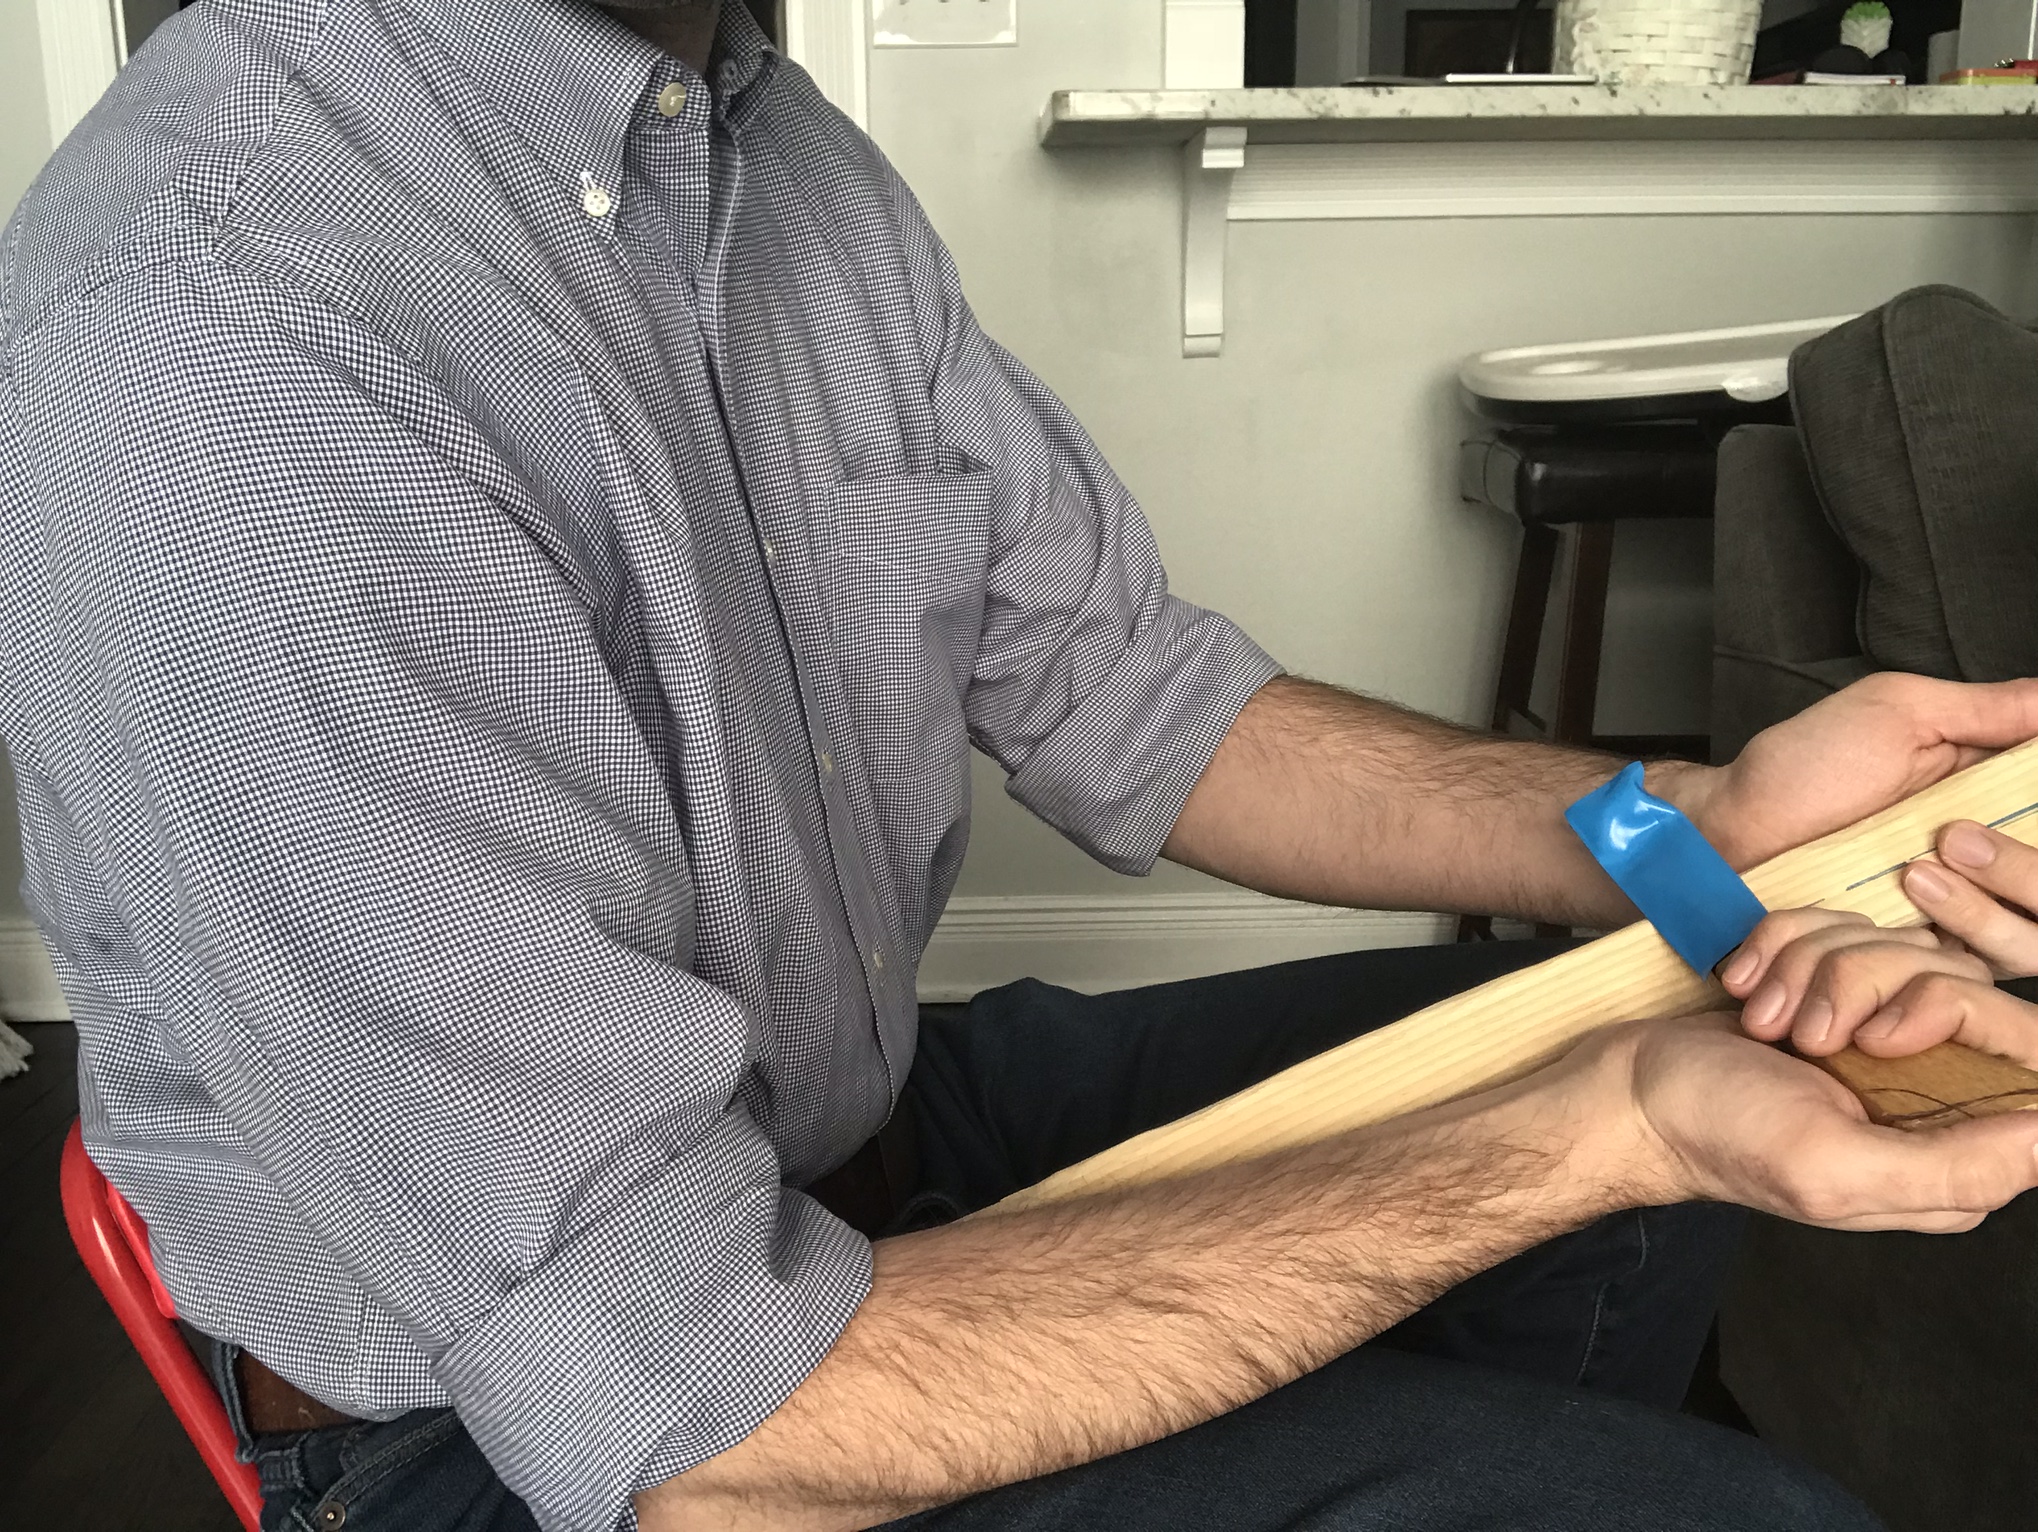
So this first picture is showing the Crooked Knife at the "top" of the cut close to the hand holding the piece we are working on. We are then going to draw the knife down towards us in a controlled fashion while keeping the knife hand close to the wood.
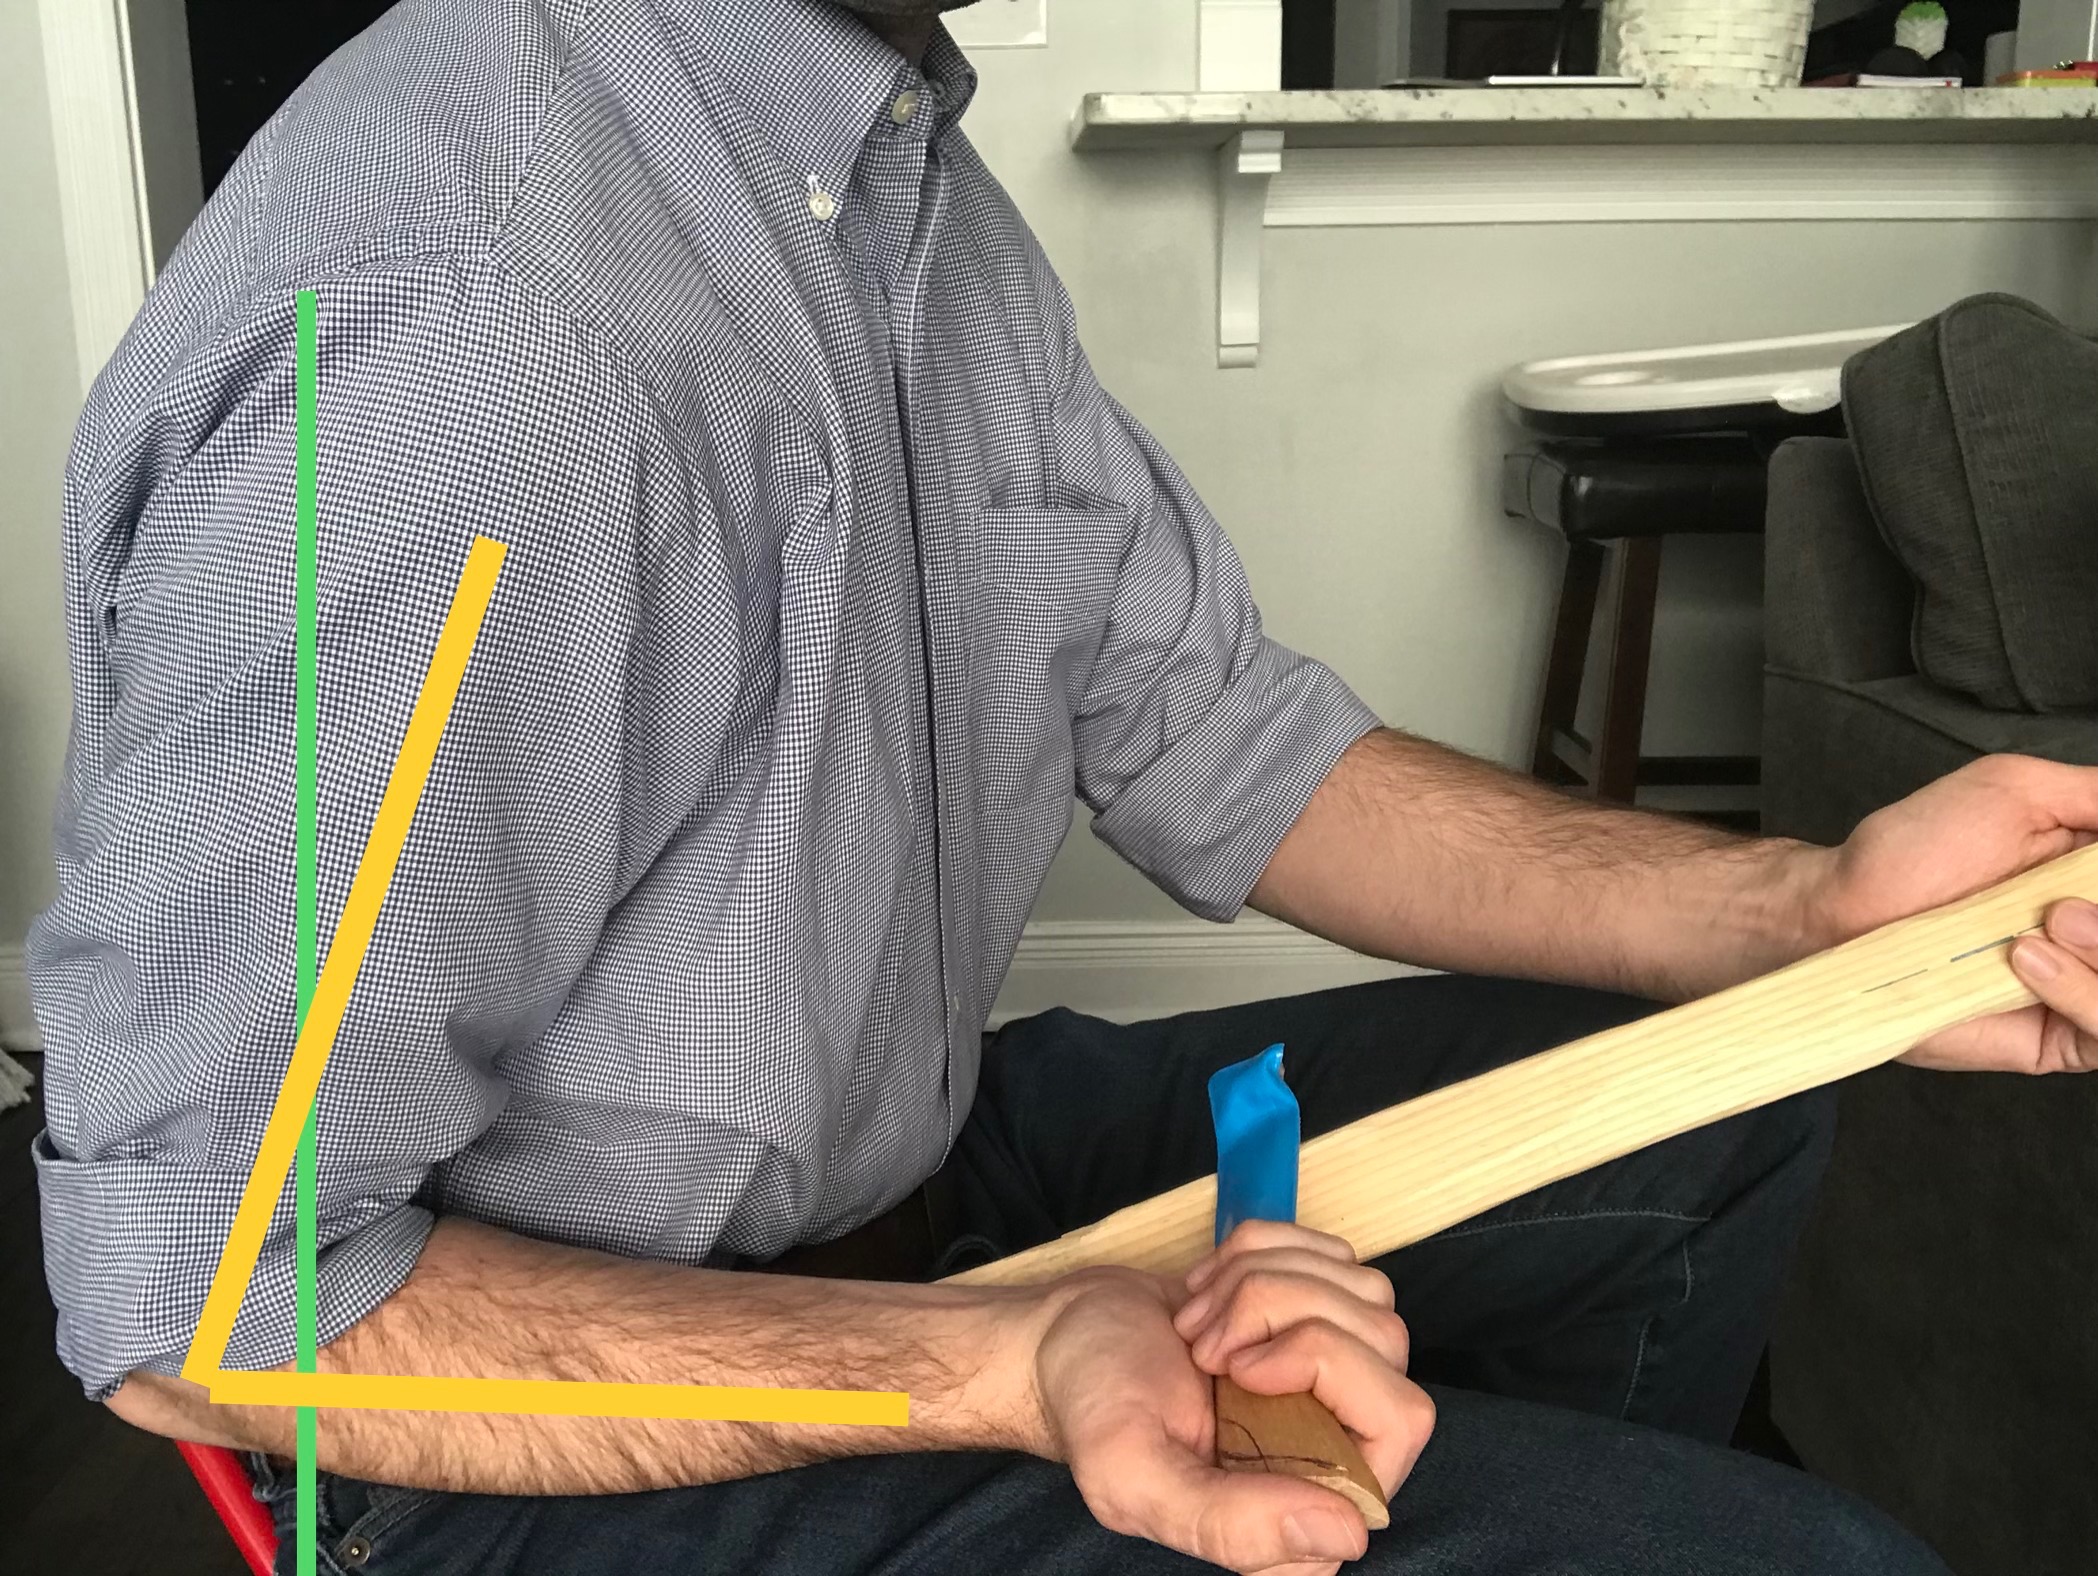
In this second picture, we see the knife at the "bottom" of the cut. We want to point out a couple things:
- my elbow joint is bent past 90 degrees. The yellow line illustrates this.
- the tip of my elbow is past the vertical plane of (aka behind) my back. The green line shows roughy where my back is.
- there is a lot of space between the knife and my stomach
The first two points are very important for the following reasons: as the knife is moving from the "top" to to the "bottom" of the cut, my hand is very naturally moving along the wood. However, as we get past the "bottom" of the cut, in order for my hand to keep moving backwards, the tip of my elbow would have to rise as well. In other words, you have to lift your forearm up in order for your wrist to touch your ribcage.
You can experience this yourself by doing the following:
- Sit in a chair
- Make a fist and place the bottom of your fist on the top of your knee
- Slowly pull your fist towards you while keeping it in contact with your thigh
As you pull your fist back, it will first feel very easy but as your fist gets closer to your stomach, you feel your shoulder stretch and you forearm trying to rise. This is because your elbow joint has to now "close" as your upper arm moves past your back.
In practice, this means that with very little force you should be able to get the knife to a point that is very safe for you.
In order for you to cut yourself, you would have to exert a lot of force and move your arms in a way that is very uncomfortable.
Moral of the story: go slow and use just enough force to slice the wood and be watchful of where your knife hand is in respect to your stomach and leg.
How to carve wood when using a Crooked Knife:
Most of the time when you are carving with a Crooked Knife, you will be using a very simple cut where you lock your wrist and pull using the larger muscles of your shoulder. Using these muscles is what allows you to carve for a long time as opposed to using the smaller muscles of your wrist and forearm.
A less common cut is to keep your hand in the same location and carve the wood by rotating the knife using your wrist muscles. While this is more tiring, it does allow you to make more precise cuts when carving details or moving in tighter spaces.
Straight Pull Cut
This shows you the basic motion of the straight pull cut.
Notice the following:
- Wrist is locked
- The angle between the blade and the forearm is more than 90 degrees
- The thumb is used to keep the angle of the blade to the forearm constant as you cut
Wrist Detail Cut
This shows you the basic motion of the wrist detail cut.
Notice the following:
- The hand is stationary
- The rotation of the knife is primarily coming from the wrist muscles and pressure from the thumb
- The range of motion is relatively small since the hand is not moving which makes detail cuts easier
Crooked Knife Videos.
There are a lot of videos online that show people using crooked knives for a wide variety of purposes.
Below, we have links to several videos with sub links that take you directly to where the the crooked knife is being used.
Cesar's Bark Canoe
- Shaping a stem piece
- Trimming bark and making pegs
- Shaping the end of a center thwart
- Shaping the end of a rib
- Shaping a canoe paddle after roughing it out with an axe
Ray Mears' Bushcraft - Birchbark Canoe
- Explaining what a crooked knife is and how it's used
- Shaping canoe gunwales
- Talking about how your hands feel after using a crooked knife
- Good view of how to sit and hold the wood while shaping
- Shaping planking for the building frame
- Picture showing a man removing lots of wood from a pole
- Using the knife to split and then shape wood for the stem pieces
- Creating a notch on a board to be used a "height stick"
- Trimming gunwale pegs down to length
Where to buy Crooked Knives
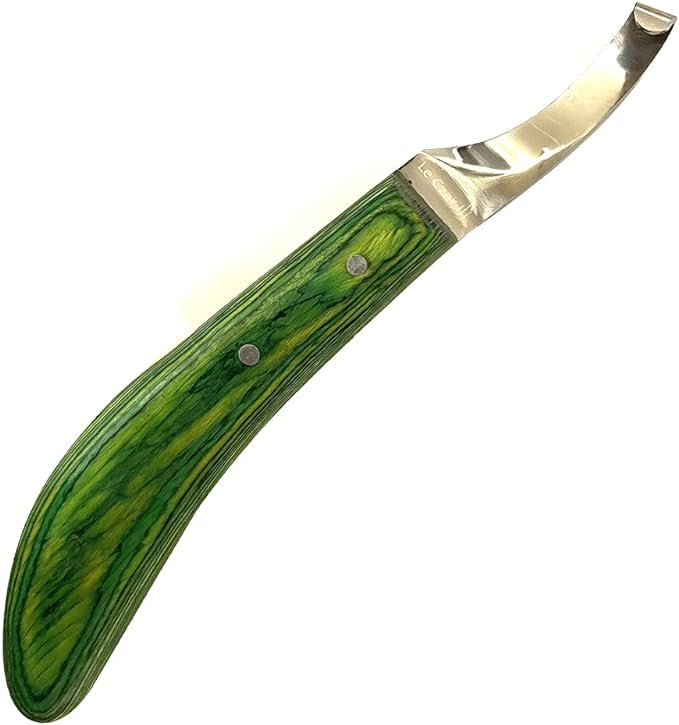
There are several vendors that offer crooked knives but the easiest way to get started is to purchase a "hoof knife" or what is sometimes called a "farrier's knife". Below is one we recommend:
Buy it on Amazon
Other tools to use with a Crooked Knife
In addition to a Crooked Knife, there a couple of other tools that are very useful if your are going to be doing wood working the "old fashioned woods way"
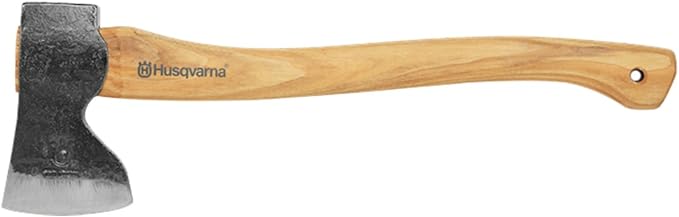
Carpenter's Axe
Carpenter's Axes are specifically designed with a straight bit and finger groove to make taking off wood very easy.
Generally, you would do a lot of the "rough" work with a Carpenter's Axe and then do more of the finishing work with a crooked knife.
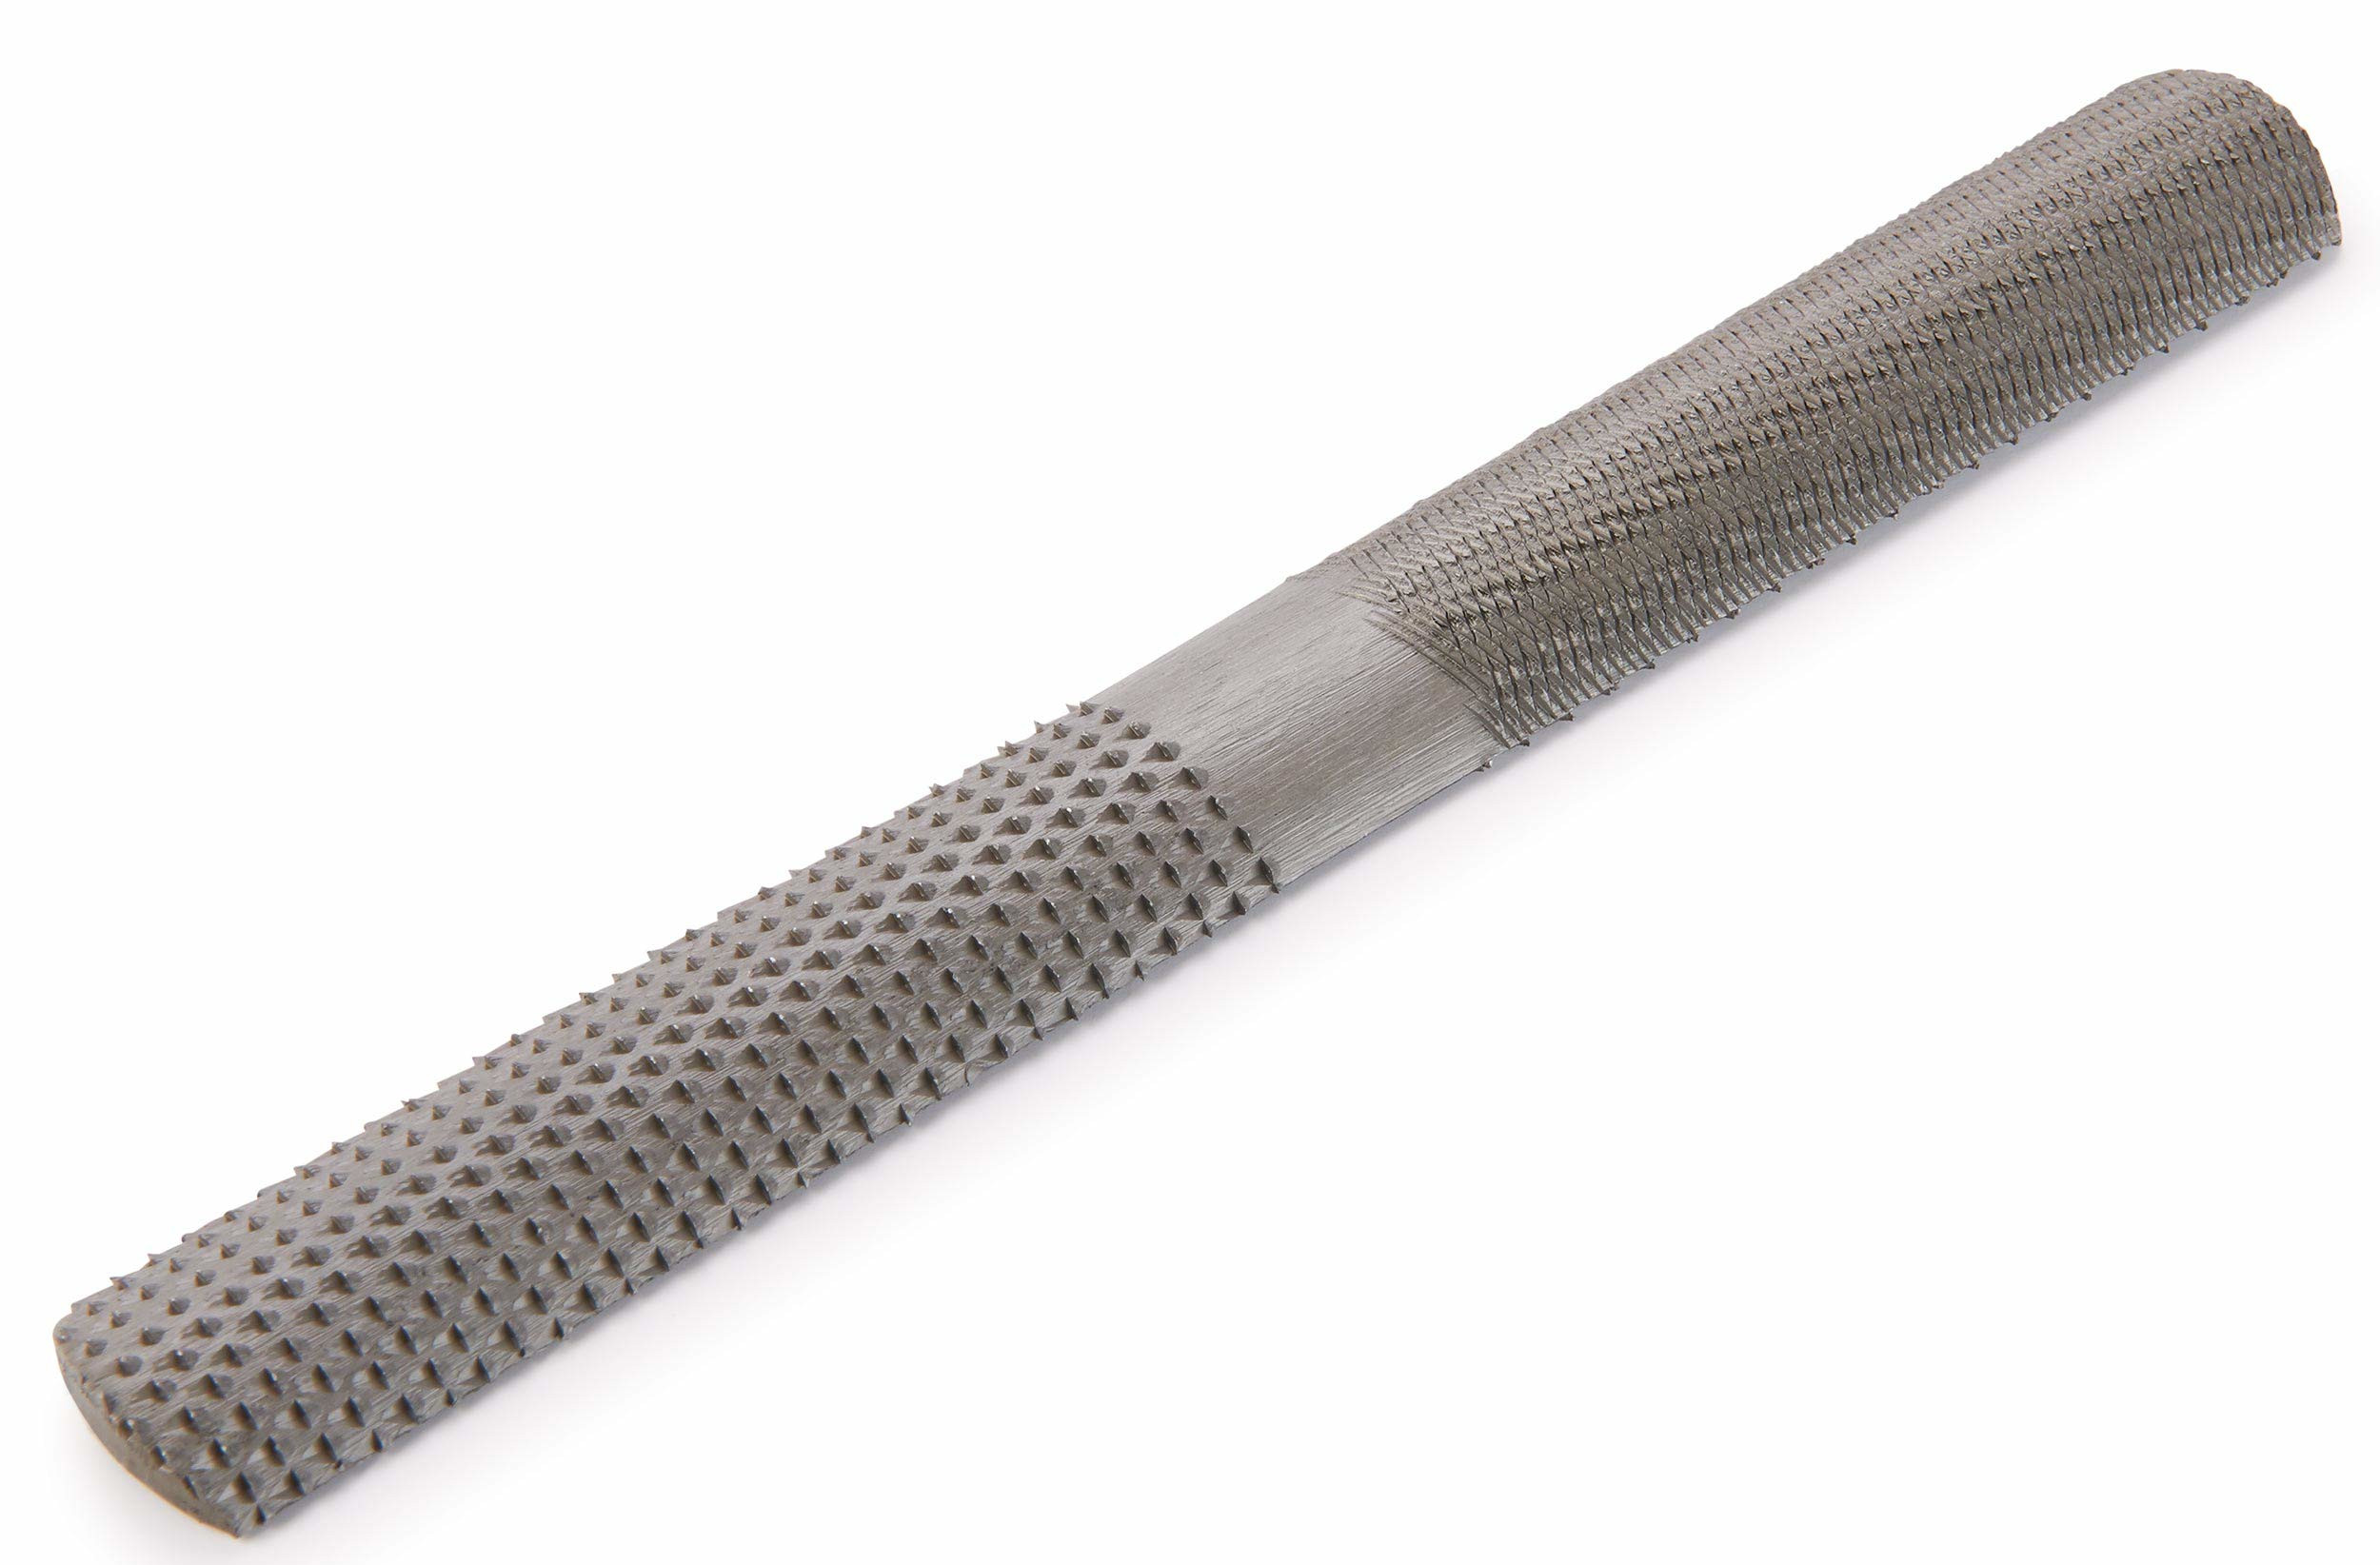
4-in-1 Rasp
A 4-in-1 Rasp is very useful for when you want to remove wood relatively quickly using either a flat or round surface. It's most commony used to shape out hardwoord handles or remove rough spots quickly
Books with information about Crooked Knives
The Survival of the Bark Canoe by John McPhee
The book that got me into Crooked Knives. It profiles birckbark canoe builder Henri Vaillancourt and has some great descriptions of how a Crooked Knife is used and the kind of work it can produce.
Canoe Paddles: A Complete Guide to Making Your Own
Has an entire chapter devoted to how to make your own Crooked Knife. Talks about the pros and cons of several different blade shapes but doesn't have a lot of information on how to use a Crooked Knife.